Next: 5.2.4.1 Filling in EPIC MOS details Up: 5.2 Proposal details page Previous: 5.2.3.2 Filling in time constraints
Before entering exposure details, it is worth considering how XRPS will handle entries internally. Within an observation, a subdirectory is opened for each exposure. For each of the XMM-Newton science instruments at least one exposure must be specified. The suggested order (as mentioned already in § 4.6) is,
Thus, the recommended sequence of steps to fill out the exposure details for an observation, using the top row functional buttons at the bottom of the observation details page, is first to proceed to ”Add EPIC MOS” and, once finished with EPIC MOS-1 and EPIC MOS-2 exposures, to ”Add EPIC pn”, before going on to ”Add RGS” and ”Add OM”, as often as necessary to fill in all required exposures (see the following paragraphs).
Alternatively, a functional button at the bottom of each exposure page can be used to copy exposures. Also at the bottom of the page there is a button to delete exposures. Note that for Mosaic observations the required exposures of EPIC and RGS instruments are already in the system and, therefore, do not need to be created and should not be deleted; users should only set the EPIC filters. For any other change in Mosaic observations, users have to contact the SOC via xmmpi@sciops.esa.int email account.
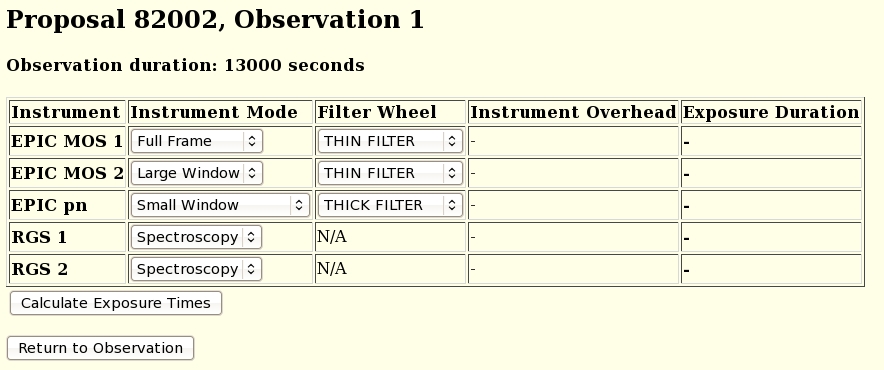
A much faster way of doing this is to use the first button in the second row ”Add Standard Exposures” which leads to a form (see Fig. 11) where ”Instrument Mode” and ”Filter Wheel” of the five XMM-Newton X-ray instruments can be defined in one go.
 |
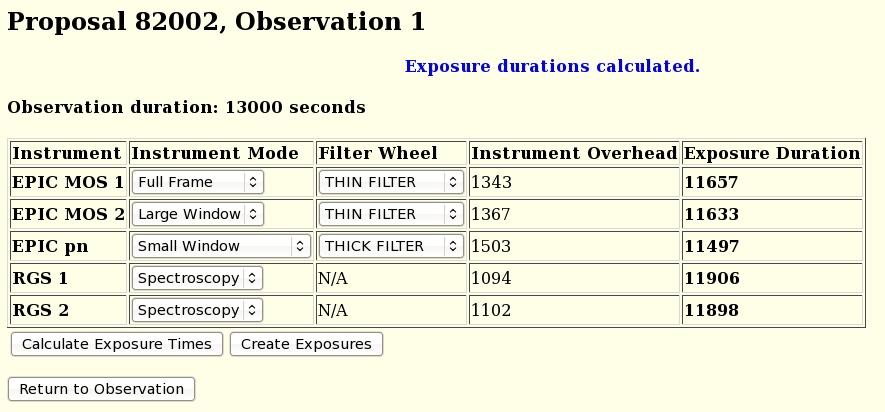
Pressing the Calculate ”Exposure Times” button calculates automatically ”Instrument Overhead” and ”Exposure Duration” for each instrument and enables the button ”Create Exposures” (see Fig. 12) to create all five exposures in one go.
 |
The second button in the second row of the observation details page (Figure 9), ”Adjust Exposure Time”, will automatically calculate the exposure duration, ie., overheads subtracted, of all the X-ray instruments for the given Total Observation Duration input in the Observation page.
OM exposures have to be added manually because the times of multiple exposures can not be adjusted automatically. For maximum scientific yield, unless the user has specific requirements, it is recommended to make a series of exposures with filters ”UVM2”, ”UVW1” and ”U”. The mode has to be chosen according to the target characteristics (see 5.2.4.5).
XRPS will count all exposures belonging to one observation consecutively. The name of the instrument for which an exposure has been defined will be part of the file name visible in the navigation tool.